As you may remember from my previous post, I believe that Sentence Frames are a high-yield strategy for our English learners and should be provided for every speaking and writing activity. However, sentence frames for ELLs are not one-size fits all. We want to be sure to differentiate our sentence frames to make them appropriate for learners at all levels of proficiency.
What's appropriate for each level?
Since 40 US states currently use the WIDA standards for ELLs, I'm going to show how we can use the WIDA performance definitions to help differentiate our sentence frames.
As you can see, at levels 1 and 2, students are able to use words, phrases, and simple sentences. As we move up to levels 3 and 4, students are able to use longer and more complex sentences. Therefore, the sentence frames we provide to lower proficiency students should help students construct simple responses, while the sentence frames we provide higher proficiency students should elicit longer, more complex responses.
Examples
Below is an example of how a sentence frame for "predicting" might change across proficiency levels.
It's easy to see how the complexity evolves from Level 1 through Level 5. Below you can see an additional example- these sentence frames for discussing main idea are differentiated for Levels 1-2 (top) and Levels 3-4 (bottom).
It does seem like extra work up front, but once you've created a set centered around a particular skill or topic, you can reuse those when reviewing the skill or topic in the future. Also, the more practice you get at creating sentence frames, the easier and quicker it becomes.
This week, I want to focus on one of the simplest strategies you can use to support your ELLs- sentence frames. Sentence frames are designed to encourage the use of academic, content and technical vocabulary, to increase the linguistic complexity (how detailed and connected the ideas are) and to help develop fluency in language forms and conventions.
In my opinion, when working with ELLs, sentence frames should be provided for every speaking and writing activity. They provide students with quality language models, which can be assimilated into the student's own lexicon.
Using Sentence Frames
It is best to consider the target language- the language you want students to be understanding and using to read, discuss, and write about a topic- and to prepare your frames when planning your lesson. Follow these steps:
Plan your questions/tasks
Anticipate the content and complexity of the student response
Create your frames based on responses students might give
Differentiate your frames by proficiency level
Add supports (visuals, word walls)
Model sentence frames every time
For more advanced students, you may be able to work together to create appropriate sentence frames. The last item on the list may be the most important- be sure to model the frames for students every time you introduce a set. Just putting them up isn't enough- students
need to see and hear them modeled by fluent speakers.
Creating your frames
The truth is, this is not as hard as it seems. For example, say we are reading the story Cinderella and talking about character traits. I might ask students "What kind of person is Cinderella?". Students might give some of the following answers:
Cinderella is hardworking.
Cinderella is hardworking because her stepmother makes her do all the housework.
The text says that Cinderella does everything for her stepmother and sisters, so I think she is hardworking.
From that, I can get some basic frames:
Cinderella is _____.
Cinderella is _____ because _____.
The text says _____, so I think _____.
Does it make it too easy?
This is often a concern I hear from teachers. They feel that providing sentence frames and other supports "dumb down" the task or activity. I assure you, this is not the case! Remember that our ELLs are learning both the language and the content at the same time. Providing sentence frames still requires the student to plug in the key content ideas (the "meat"), but it also reduces the language demand so the student can focus on content skills.
Often times, I see sentence frames provided for lower proficiency students, but not for higher proficiency ELLs. We don't want to take away this scaffold entirely as students acquire more English, instead, the scaffold should evolve along with the proficiency level. That's where differentiation comes in!
Next week, we'll talk a little about differentiating sentence frames based on proficiency levels.
So, in my previous post, I talked about how to create an effective, high-quality word wall. BUT- it's not enough to just have an awesome word wall. What's the point in going through that effort to put it up, keep it relevant, and change it out.....if you're not going to actually actively use it as part of instruction? If you're not using it, it's just decoration, friends!
There are a number of word wall activities that you can do to get students actively using the word wall. Here are a few suggestions:
List-Group-Label
This strategy can be used for building or organizing your word wall. Select a topic- for example, plant reproduction.
List: Have students brainstorm all the words they think relate to the topic.Visually display student responses.
Group: Divide your class into small groups. Each group will work to cluster the class list of words into subcategories. As groups of words emerge, challenge your students to explain their reasoning for grouping words as they have.
Label: Invite students to suggest a title or label for the groups of words they have formed. These labels should relate to their reasoning for the grouping.
Mystery Word
Divide students into groups of 3-4 and give each group a whiteboard. One person in the group is the word wall runner, one is the recorder and these roles should switch each round.
The teacher gives clues to a word wall word.
Students discuss and try to determine which word the clues are about. The word wall runner makes trips to the word wall as necessary and the recorder writes the group's answer on the whiteboard.
The team to identify the mystery word first gets a point, the team with the most points at the end of the game wins.
Flip It
Have students work individually or in pairs to create a short video on Flipgrid for each vocabulary word. Videos can include explanations, examples, definitions, and more- possibilities are endless! Add the FlipGrid QR codes to your word wall to make an engaging, student-created word wall.
Word Wall Information Gap
Create a table of information or a graphic organizer based on your word wall. Fill in some of the information, but leave other information out, so that students must use the word wall to complete the organizer. See an example below:
How do you USE your word wall in your classroom? What strategies do you incorporate to ensure students use the word wall during learning?
I love my job, and I really love helping the teachers I coach improve the way they scaffold instruction for English language learners. In the past, I've worked with a few of my schools on improving their word walls.
Word walls can be an amazing tool for supporting ELL language growth- if used correctly! They're also one of the most basic changes you can make to support ELLs. Often, when I visit classes, I find word walls, but they fall short in a few basic ways.
For a word wall to be effective, it needs to have a few basic qualities. It should be:
Highly visible
In an area of the classroom where students frequently look
Not hidden behind other items (easels, anchor charts, etc)
Reachable to students so they can interact with it
Highly visual
Visuals or realia included for each (or most) words
Organized in a way that is both visual and visually appealing
Relevant
Contains the current words students need to know
Related to the current unit/topic/focus
Interactive (choose one or more):
Students generate or organize key terms
Organized as a graphic organizer
Includes QR codes for additional info
Includes REAL objects students can view, touch or interact with
Words are removable or have flaps to lift for additional information
Can you provide an example?
While working with one school in particular, I decided it might be a good idea to create a live, working model that teachers could see and interact with. Something concrete to hopefully inspire them!
Therefore, I created this word wall based on our county curriculum for 3rd grade mathematics- Area and Perimeter. There are several interactive elements included:
QR codes leading to additional information
The ability for students to organize it in a way that makes sense to them
Hands-on option to measure a piece of paper and calculate area and perimeter (with an option to self-check their answer!)
Many schools are requiring word walls now, so if you're going to take the time to put one up anyway, you might as well get some academic bang for your buck as well. Be sure to grab the free Word Walls for ELLs: Planning Sheet and Checklist from my TpT store. These documents can help you ensure you're following the tips discussed above.
I hope these tips help you to construct effective word walls for your own students. Tune in next week when I talk about activities you can do with your word wall.
Also, check out the post about Digital Word Walls on my technology blog!
This year, I've been providing monthly after-school PD "Spark Sessions". These are 25-minute PDs about various strategies for supporting ELLs. When I conduct PD, I like to give teachers solid strategies that are easy to implement. I want them to be able to walk into the classroom the next day and use what they've learned.
One of the most recent sessions I did was on Vocabulary Instruction for ELLs, where I introduced several strategies for teaching and practicing vocabulary. One of the strategies I introduced was a Five-Day Vocabulary Protocol that I developed.
Today, a 2nd grade teacher at that school told me how she'd been regularly using the protocol with her students over the last several weeks as part of center time, and she was noticing a measurable increase in their ability to retain and use new vocabulary words. I also have used it with great success, so I decided to share the protocol with you in hopes that it can help your students expand their vocabulary as well. I've seen this strategy used successfully from grade 2- grade 12!
Research Basis
Research shows that students need to interact with a word multiple times and in multiple ways in order to master that word in incorporate it into their vocabulary. Additionally, ELLs need more explicit instruction in vocabulary- especially academic vocabulary- through predictable routines and activities (Brown University).
It's important to give students the opportunity to explore vocabulary words in depth by:
stating the meaning of the word in their own words*
using the word correctly in context
exploring synonyms or examples
exploring antonyms or non-examples
associating the word with a non-linguistic representation (usually an image or movement)
*When students write the definition for the word, it is particularly important that they do so in their own words rather than copying a definition.
Other ways to "dig into" a word:
identifying homophones/homonyms
identifying prefixes, suffixes and roots
multiple meanings
This vocabulary protocol gives your students the opportunity to do the first five on the list over the five day period, with a bonus spot for your particular focus (see "other ways to dig into a word" above).
There's a FREEset of printable cards for Five-Day Vocabulary in my TpT store. I recommend that you choose no more than 4-5 words for each unit/topic/story. Give students a card for each word (print double sided to save paper). If desired, punch a hole and put them on a ring (you can build a growing vocabulary reference throughout the year). As a warm up or part of your center time, have students complete the daily task for each word. Click below to get your copy!
If you use this with your students, please let me know how it goes!
As teachers, I think one of the hardest things for us to do is slow down and wait. Providing adequate wait time for students- especially ELLs- requires conscious effort. We have so much to get through in so little time that the temptation is to keep the pace moving quickly.
Often times when observing teachers, I notice that they will ask a question and then call on the first child to raise his or her hand. If that child doesn't have an answer, they'll quickly move on to the next child with their hand up. This is a mistake!
As teachers, it can be hard to provide adequate wait time, because we wrongly feel that if the child "gets it" they'll be able to answer quickly. This isn't the case. Like good coffee needs time to percolate, our students also need time to “percolate” the information they take in. They need extra time to internalize information, process questions, and formulate responses.
Unfortunately, research tells us that even the best teachers often fail to provide enough wait time for students- the average in most studies is 1 second (Stahl, 1994). Wait time is important for all students- the average student will be able to formulate a response in about 10 seconds. Wait time is particularly important for our English learners, who not only have to internalize what they’ve learned, they often have to process and produce new language to show their understanding as well- these students will need closer to 20-30 seconds, depending on their English proficiency level.
When students have enough wait time, they are able to answer questions with more confidence, which in turn increases their motivation to learn more and answer more! So, how can we ensure that we're providing enough wait time? Here are a few strategies to try.
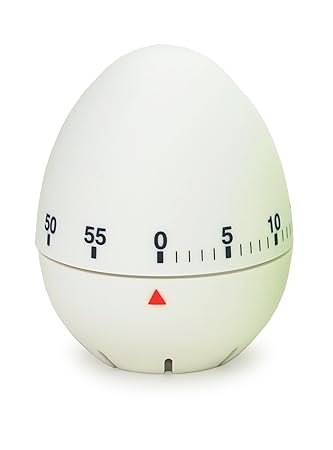
1. Wait Time is Egg-cellent
Go to the dollar store closest to you and grab a cheap egg timer. When you ask a question, set the egg timer to at least 20 seconds (30 or 45 is better for lower proficiency ELLs). Tell students to think quietly without raising their hands for the time you set. When the timer goes off, if they feel they know the answer, they can raise their hands.
2. Give Me a Hand
Another simple (and free!) way to ensure wait time is to hold up 5 fingers and slooooowly count down. This gives you and students a visual indicator of think time, and can help keep you from rushing forward too quickly. Use 10 fingers with lower proficiency students.
3. Get Back to Me
I love the way that the teacher in this video from The Teaching Channel, upon realizing that the child isn't ready to answer, gives him more time and then does circle back around to allow him to answer. You can tell the additional wait time really gave the student time to process a response. Even better, you can tell this is a habit for this teacher- the student himself says "you should get back to me".
4. Sit With It
I often had students who would pop up a hand before I even finished asking a question, regardless of whether they had an answer prepared or not. With younger students, one way I successfully increased wait time was to have students sit on their hands when I asked a question. After about 20 seconds, I would say, "If you think you have an answer, please raise your hand". Then I would wait a few more seconds, if necessary, until most students had their hands raised.
Research also shows that increasing the amount of time between the student's answer and your response has a better effect because it allows the student to process longer give a more complex response, if they have anything to add to their initial response. The teacher can then ask additional questions, or even better, invite additional student response by saying something like "Hmm...let's think about that answer."
I hope these practical strategies will help you improve wait times in your classroom.
You may have noticed a
recent trend in education toward visual notetaking, also called Sketchnoting.
This practice has many benefits and applications in education, but I can see
this tool as especially beneficial for our English language learners.
What are sketchnotes?
Sketchnotes are rich,
visual notes created with a combination of drawings, handwritten notes, and
other visual elements such as shapes and arrows. There is no set
"format"- your imagination is the limit. Here's an example I created
about the elements of fiction:
What are the
benefits?
The
value of sketchnoting is supported by several theories, such as the dual coding
theory. The dual coding theory (Paivio, 1971), states that both verbal and
nonverbal processing are essential for learning. According to the theory, our
minds have two separate stores of information (verbal representations and
mental images) and learners require both to adequately retain and retrieve
knowledge.
By
drawing pictures of what they are hearing, students’ minds are engaging
multiple modalities which leads to increased retention of information.
According to author Wendy Pillars (Visual Notetaking for Educators),
sketchnoting or ’edusketching’ can improve retention by up to 55%. This is especially important
for students who are learning the content alongside the language.
The
visuals that they create during Sketchnoting can help them make important
linguistic connections and support their language growth while helping them
retain important content concepts. Since sketchnoting requires students to use
both receptive and productive skills, along with higher-order thinking to
synthesize information into a sketchnotes, students are being stretched
linguistically and thinking critically. Sketchnotes also allow lower
proficiency beginners to make notes they can understand, while connecting
essential vocabulary to rich drawings and visuals, with the opportunity to
incorporate their native language as needed for additional support.
How do I get started?
This video reviews the basics of creating visual notes:
Which tools should I
use?
While there are many tools
out there, I like the idea of sketchnoting by hand with paper and pens.
According to Muller & Oppenheimer (2014), students who took notes by
hand outperformed those who were using laptops for notetaking in conceptual understanding
and long-term recall. If you must use technology for sketchnoting, I'd
recommend using a tool like Adobe Draw- Sylvia Duckworth has a great presentation on using this tool for
sketchnoting.
I prefer to use my
RocketBook Wave for sketchnoting (mine was gifted to me at the Google Innovator
Academy). I can easily digitize the notes as an image or pdf and send them off
to any number of destinations (Drive, email, etc.). When my notebook is full, I
can throw it in the microwave with a glass of water and erase it all so that I
can reuse the notebook. Super cool!
Are you already using
sketchnoting with your ELLs? Tell me how in the comments!